|
E46 Rear Subframe & Floor Reinforcement
Rear subframe and floor failures are quite common on the E36 and E46 models. Unlike the E36 M3, the E46 models did not receive sheetmetal reinforcements from the factory and subframe and floor failures continued to be a problem well into the E46 production. BMW even has an official fix for non-damaged cars. However, every E46 on the road potentially needs rear floor repair and reinforcement and it's a absolute must-do for any track or race car project.
There are quite a few subframe reinforcement kits on the market and they vary only slightly from each other but they all achieve the same end-goal. We like our kit best because it covers a wider area of the rear floor than some other kits. Our kit is designed to be done completely and in its entirety. This means reinforcing on the underside as well as on the top (from inside the trunk). Partial reinforcement (skipping the trunk portion) is not advised and undermines the effectiveness of our kit. Installing the plates using epoxy or adhesive is also not recommended and pointless since you must weld the top subframe mounts anyway.
Since it is assumed this procedure is being carried out by a professional shop with BMW experience, certain steps and procedures will be omitted.
Should you have any questions on the install process or related parts, please call or email us!
There are quite a few subframe reinforcement kits on the market and they vary only slightly from each other but they all achieve the same end-goal. We like our kit best because it covers a wider area of the rear floor than some other kits. Our kit is designed to be done completely and in its entirety. This means reinforcing on the underside as well as on the top (from inside the trunk). Partial reinforcement (skipping the trunk portion) is not advised and undermines the effectiveness of our kit. Installing the plates using epoxy or adhesive is also not recommended and pointless since you must weld the top subframe mounts anyway.
The Cause
The rear floor of the E46 is actually two sheets of steel with a gap between them. The rear subframe mount gussets (where the subframe is bolted to) are tack welded to the bottom layer. If the two sheetmetal layers were joined or braced together this problem may never have developed in the first place. BMW tried to eliminate flexing of the floor by bracing the front mounts but this only transferred the stress to another point. Since there is this gap between the layers, with tremendous torsional load at these points, the bottom layer twists and deforms and the spot welds eventually pop and fail. Continuing to drive with a cracked floor only worsens the problem and cracks spread. Eventually entire sections of the rear floor can rip away. Worn and spongy rubber subframe mounts contribute to additional chassis flex. Urethane or solid aluminum mounts are strongly recommended, even on street cars, as they do not allow the subframe to flex.BMW Structural Foam
BMW's official fix was to inject structural foam between the two layers. When the foam is fully hardened it adds strength between the sheetmetal layers and prevents them from flexing. There's nothing really wrong with the foam method. It's derived from aircraft construction so it's very strong, light weight, durable, and relatively easy to apply. But it doesn't address pre-existing cracks or the weak and incomplete spot welds at the top of the subframe mount. You could find yourself making welding repairs even after the foam has been applied. Also, most fabricators, welders, and body shops dislike the structural foam because it makes welding and metal repairs more difficult and dangerous (the vapors from burning structural foam is hazardous). And any future crash repairs or chassis work in this area will be more difficult with the foam.While You're In There...
Installation requires the removal of the exhaust, rear suspension, subframe, and differential. It is also recommended, but not required, to remove the gas tank. Access to the top of the floor in the rear trunk is also required. With the subframe out of the car there are quite a few additional items that can or should be replaced. Contact us for a special package price on all of the "while you're in there" parts:- Rear subframe mounts - do not re-install worn rubber mounts!
- Rear differential mounts
- Rear upper and lower suspension bushings
- Rear trailing arm pocket reinforcement (race cars)
- Rear sway bar mount reinforcement (non-M models)
- Rear spring perches on chassis and control arm
- Rear brake lines (caliper) and metal hard line above gas tank (check for rusty lines)
E46 Reinforcement Install Instructions
BimmerWorld strongly recommends this repair and installation be carried out by an experienced, professional shop. An auto body or restoration shop that is familiar with BMW chassis and components is preferred. Bear in mind that this is a reinforcement kit only. Any pre-existing cracks in the floorpan or chassis sheetmetal will need to be correctly fixed in addition to installing these plates. Note that factory BMW chassis coating can be extremely flammable.Since it is assumed this procedure is being carried out by a professional shop with BMW experience, certain steps and procedures will be omitted.
- Lift and support the vehicle and remove the exhaust, rear subframe, suspension, and differential.
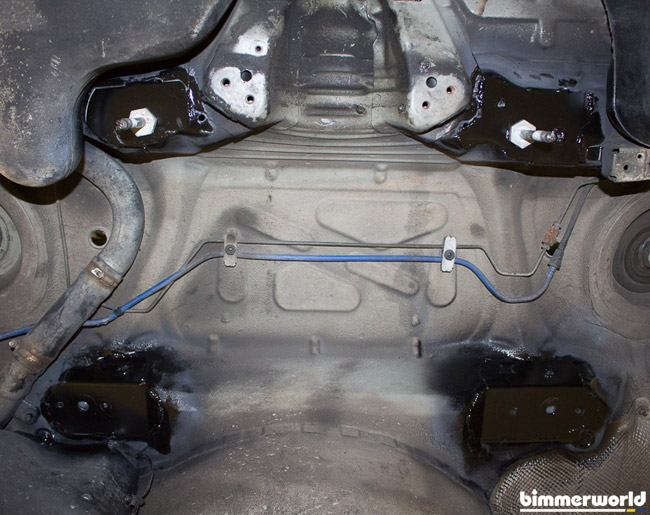
- Inspect the underside of the rear floor for cracks emanating from each of the four subframe mounting points. Note the extent of any existing floor damage or attempts to repair.
- Test-fit the placement of each BimmerWorld Reinforcement Plate.
- Prep the area around each plate for welding.
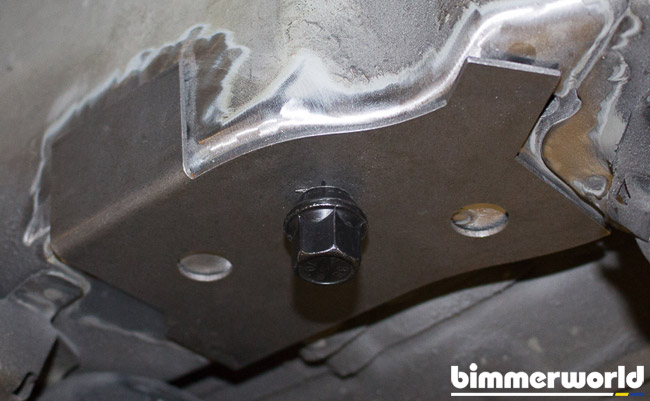
- Secure the plate in position with a 12x1.5 hex bolt (not included).
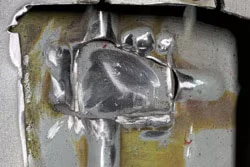
Plates and floor ready for weld. - With the plates bolted in position, note that there are extra holes in each reinforcement plate - 1 extra in each front plate, 2 extra in each rear plate. These are for rosette, or plug, welds. The E46 rear floor is actually two layers of sheetmetal (with a small gap in between). In this step we want to expose the inner-most layer so it can be joined to the new reinforcement plate.
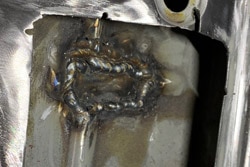
Using the holes as a guide, drill a ½” hole through the first layer to expose and gain access to the second layer of sheetmetal. Now add your rosette weld at each point.
Plug welds. - Continue welding around the edge of each plate. In areas with tight access, a stitch weld will do.
- Primer and coat the reinforcements and exposed sheetmetal. We recommend a heavy-duty chassis coater such as POR-15, Eastwood, or KBS Seal. During the drying process, continue to the next steps.
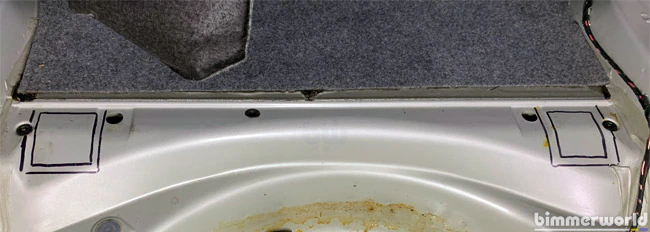
Completed and coated plate installed. - In the trunk, line up our trunk plates on the trunk floor as shown in the photo below. The top edge of the plate should butt against the existing seam running across the trunk floor. Trace the edges of the plates.
- Draw a second line about ¼” inside the trace you just made. Now make your cut into the floor along the second (inside) line.
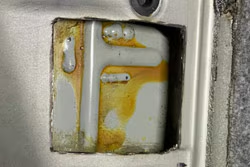
- Inside this cavity you should see three existing rosette welds in a triangle pattern. This is the top of the rear-most subframe mount and where most E46 subframe cracks begin. Inspect the sheetmetal here for pre-existing cracks.
- Again, there are two layers of sheetmetal with a small gap between them. Use a cutoff wheel and cut away the first topmost layer of sheetmetal to expose the layer underneath. Cut from one spot weld to the next, keeping a triangle shape.
- Weld the upper and lower layers of sheetmetal together from each existing spot weld. Also fix any existing sheetmetal cracks.
- Clean up any welding residue. Primer and coat the welds and any exposed sheetmetal.
- Prep the area around each cutout for welding. Pre-install the trunk patch plates over their respective holes. Line up the plate with the existing seam and tack weld the plate near this top seam.
- Bend and shape the plate so it matches the contour of the trunk floor. Finish the welds around each plate.
- Primer and coat the patches and exposed sheetmetal. If stitch welding, use a seam sealer in between each weld.
- Complete any additional subframe work (see list above). Before reinstalling differential cross-brace, place the Crossmember Spacer in between the brace and the chassis. These spacers ensure the brace and subframe stay at the correct height to one another. A dab of RTV silicone should keep it in place.
Crossmember spacers go here. - An alignment is recommended after reinstalling the subframe and suspension.
- Enjoy your fully-reinforced E46 for many more years!
Should you have any questions on the install process or related parts, please call or email us!
BMW Reinforcement Kits:
| Sort by Name | Sort by Price |


